
Shower Pan Guide: Types, Installation, Costs, and Planning
Shower Pan Guide Index
- Shower Pan Overview
- When Should a Shower Pan Be Replaced
- What Types of Shower Pans Are Available
- How Do Shower Size and Layout Affect Pan Choice
- What Materials and Components Are Used in Shower Pan Installation
- What Upgrades Can Be Added With a Shower Pan
- What Installation Details Matter in Shower Pan Work
- What Affects Shower Pan Cost
- What Mistakes Should Homeowners Avoid With Shower Pans
- How Should You Plan Shower Pan Installation
- Frequently Asked Questions About Shower Pans
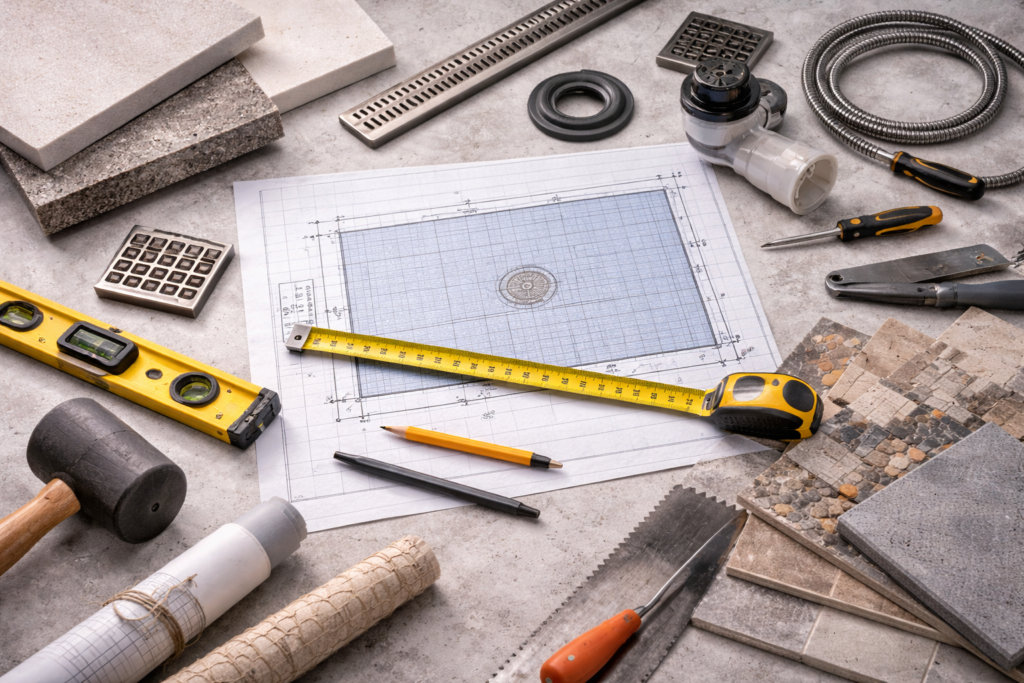
Shower Pan Overview
The shower pan is the waterproof floor of the shower that catches water and directs it to the drain. It sits below the finished shower floor surface and must maintain a slope toward the drain while keeping water from reaching the subfloor beneath. In practical remodel work, the shower pan is one of the most critical components because a failed pan causes water damage that spreads beyond the shower.
Shower pans come in several forms: pre-formed acrylic or fiberglass units, custom-built tile pans with waterproof membranes, solid surface pans, and composite materials. Each type has different installation requirements, durability characteristics, and cost implications. The right choice depends on the shower design, budget, and how the pan integrates with the rest of the shower system.
What Gets Updated During a Shower Pan Project
The work includes removing the old pan, inspecting and repairing the subfloor, installing the new pan or building a custom pan, connecting the drain, testing for leaks, and integrating the pan with the shower walls. In many cases, replacing a pan also requires replacing or modifying the lower portion of shower wall surrounds.
What Is the Difference Between a Shower Pan and a Shower Floor
The shower pan is the waterproof structure beneath the visible floor surface. The shower floor is what you see and stand on. In a tile shower, the pan is the membrane and sloped mortar bed under the tile. In a fiberglass shower, the pan is the molded base unit. When people say shower floor, they usually mean the finished surface. When contractors say shower pan, they mean the waterproof foundation.
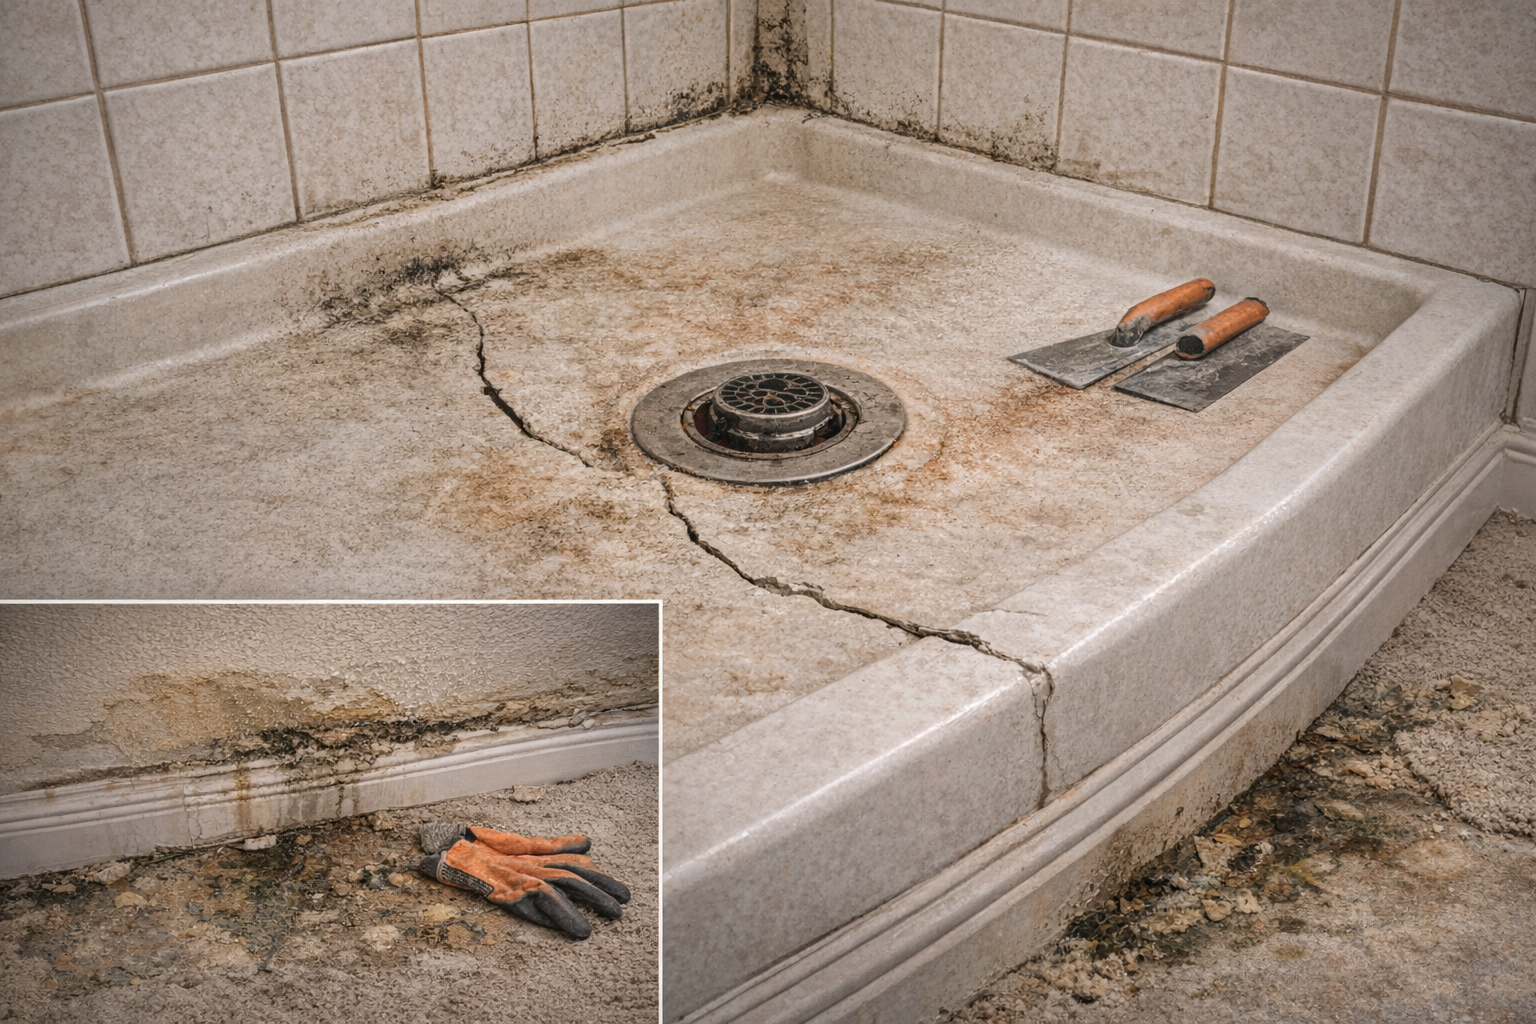
When Should a Shower Pan Be Replaced
Shower pans should be replaced when they leak, crack, or fail to drain properly. Common signs of failure include water stains on ceilings below the shower, loose or cracked tiles on the shower floor, persistent mold or mildew, and visible cracks in fiberglass or acrylic units. Even small leaks in a shower pan can cause significant structural damage over time.
Age alone is not always a reason to replace a pan, but pans over 15 to 20 years old should be inspected carefully. Materials degrade, seals fail, and building standards change. If the shower is being remodeled for other reasons, replacing an older pan while the shower is open is often the practical choice.
Consider replacement when converting a tub to a shower, changing the shower size or layout, or upgrading from a basic fiberglass unit to a tile shower. The pan must match the new configuration, and trying to adapt an old pan to a new design usually creates more problems than it solves. For layout and clearance planning, many designers reference NKBA planning guidelines.
What Types of Shower Pans Are Available
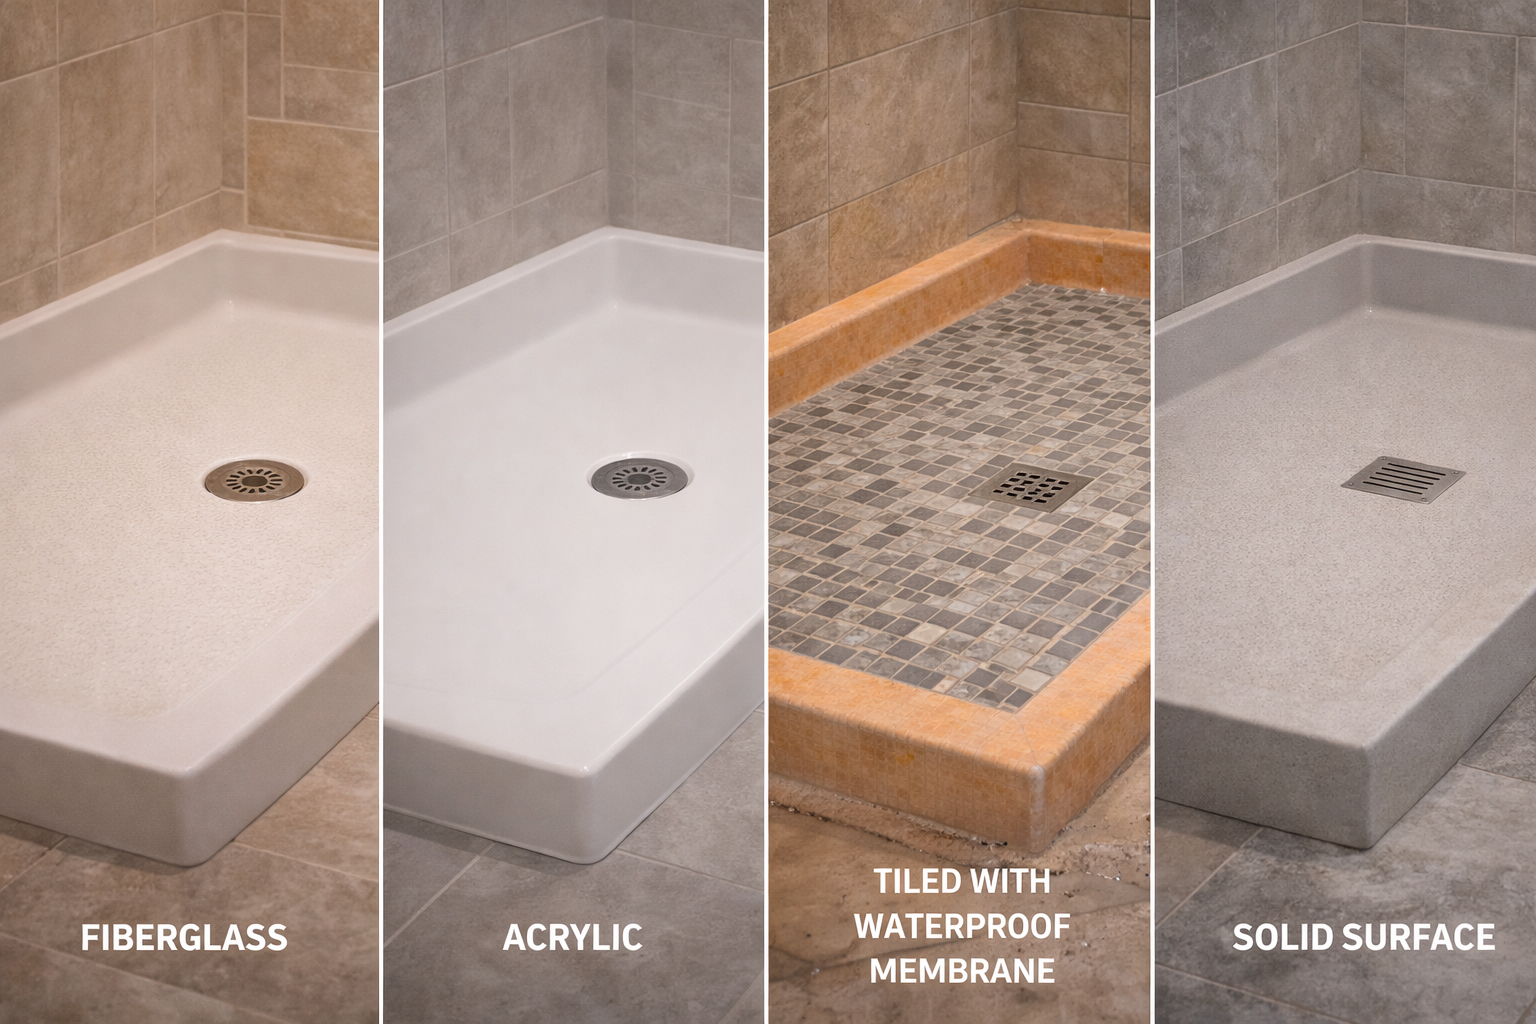
Fiberglass and Acrylic Pre-Formed Pans
Pre-formed pans are manufactured units that drop into place and connect to the drain. They are the most affordable option and install quickly. Fiberglass is cheaper but less durable than acrylic. Both materials can scratch, crack if something heavy is dropped, and may discolor over time. These pans work best in standard sizes and simple layouts. Another detail worth comparing during planning is bathroom remodeling.
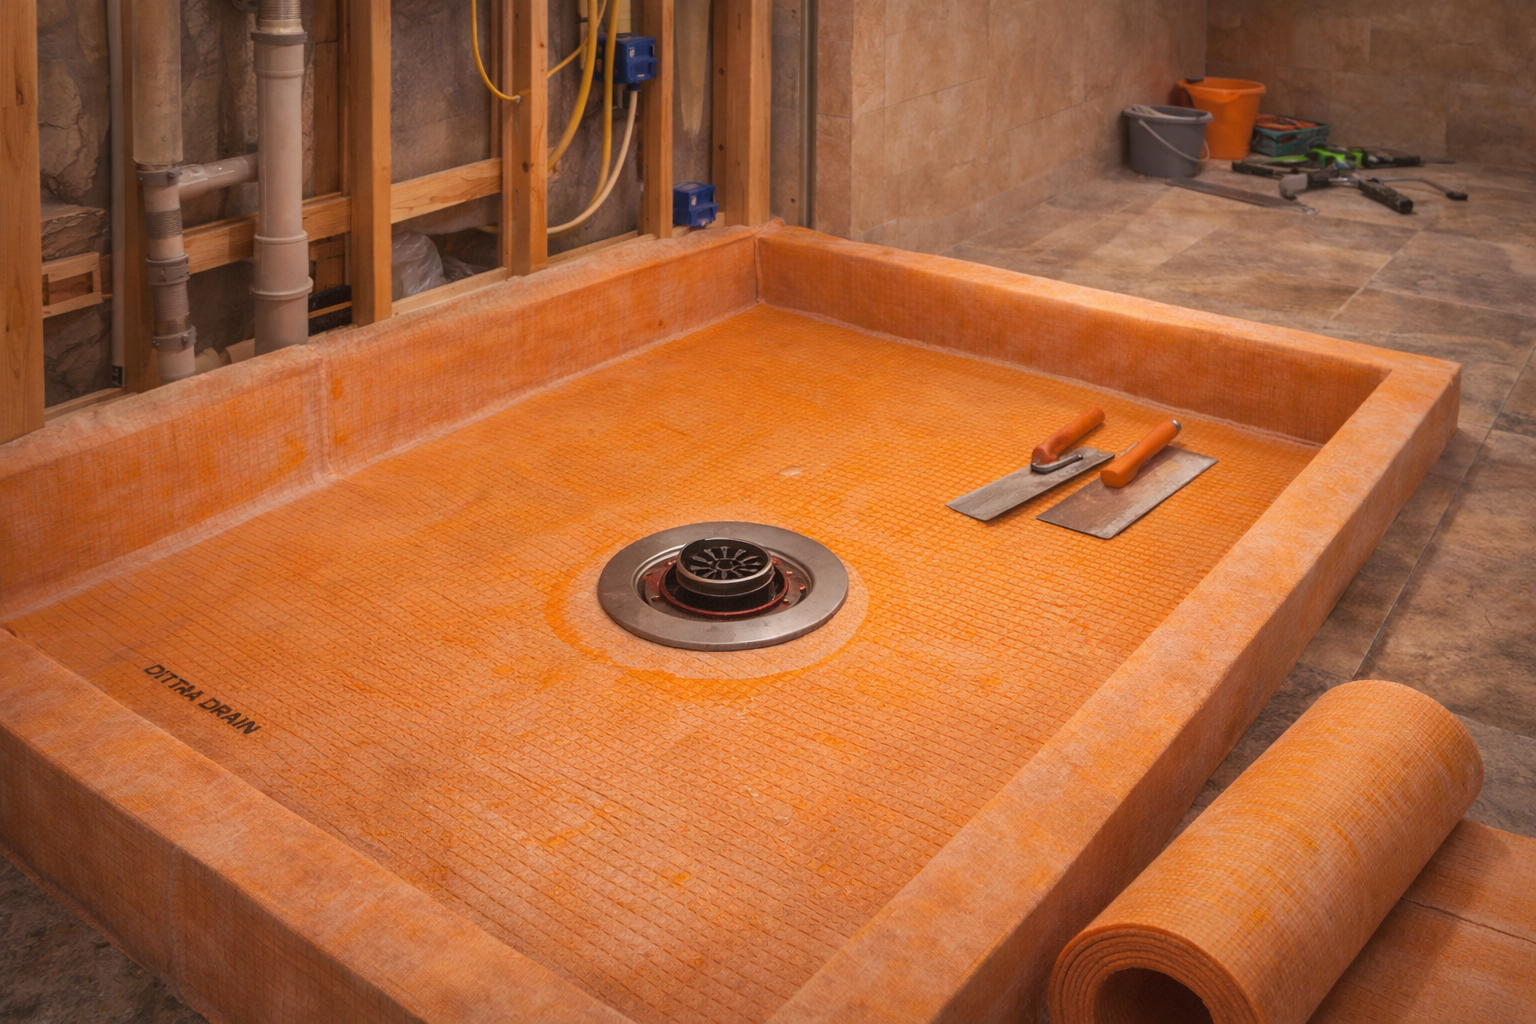
Tile Shower Pans with Waterproof Membrane
Custom tile pans are built on-site with a sloped mortar bed, waterproof membrane, and tile surface. This approach allows any size or shape and creates a seamless look with tiled shower walls. The membrane is the critical waterproof layer, and the tile provides the wear surface. This is the most labor-intensive option but offers the most design flexibility.
Solid Surface Pans
Solid surface pans are cast from materials like Corian or similar composites. They offer seamless appearance, excellent durability, and can be custom-sized. Scratches can be sanded out, and the material resists stains and mold. These are premium options with higher material costs but lower maintenance over time.
Composite and Cultured Stone Pans
Composite pans combine crushed stone with resin binders to create durable, attractive surfaces. They offer better aesthetics than fiberglass and are more affordable than solid surface. These pans come in standard sizes and some custom options, with various colors and textures available.
How Do Shower Size and Layout Affect Pan Choice
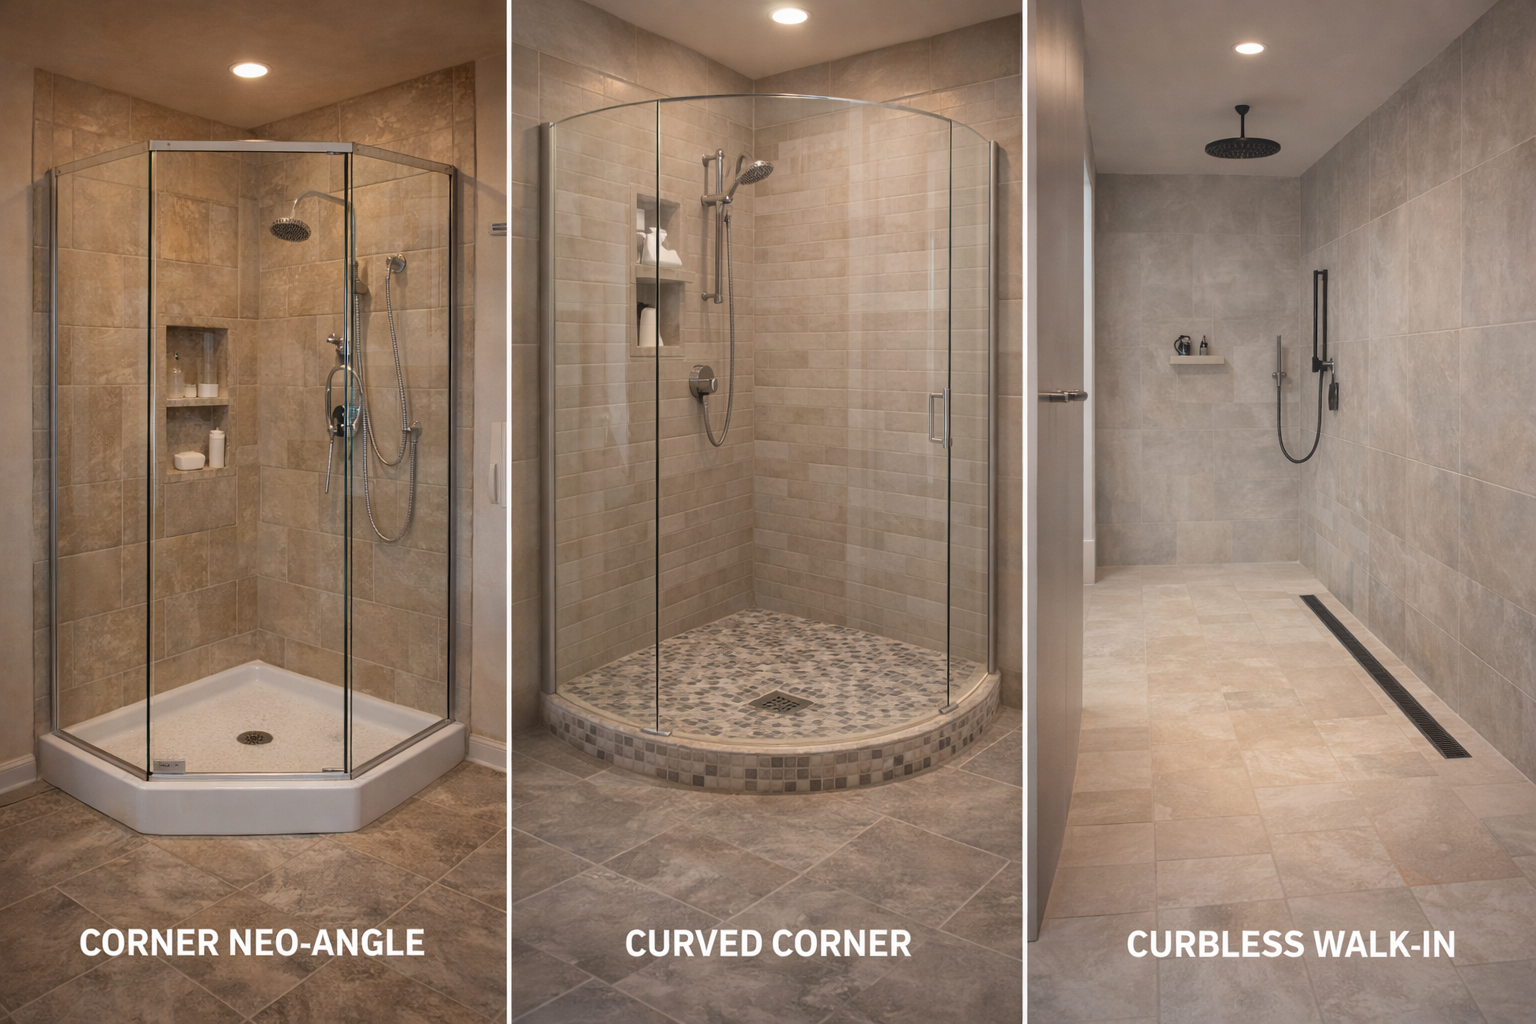
Standard rectangular or square showers work well with pre-formed pans in common sizes like 36×36, 48×36, or 60×32 inches. When a shower deviates from standard dimensions, custom-built tile pans or made-to-order solid surface pans become necessary. Neo-angle showers, curved showers, and walk-in designs require pans shaped to match. Homeowners weighing long-term operating costs often review Energy Saver guidance.
Curbless showers need pans with a very gradual slope that still drains properly while allowing wheelchair or walker access. These pans often require precise subfloor preparation and may need linear drains instead of center drains. The pan design must account for the transition to the bathroom floor.
Small showers benefit from pans that maximize standing area while maintaining proper slope. Large showers may need multiple drain points or carefully planned slopes to prevent standing water. The pan must work with the overall shower design, not fight against it.
What Materials and Components Are Used in Shower Pan Installation
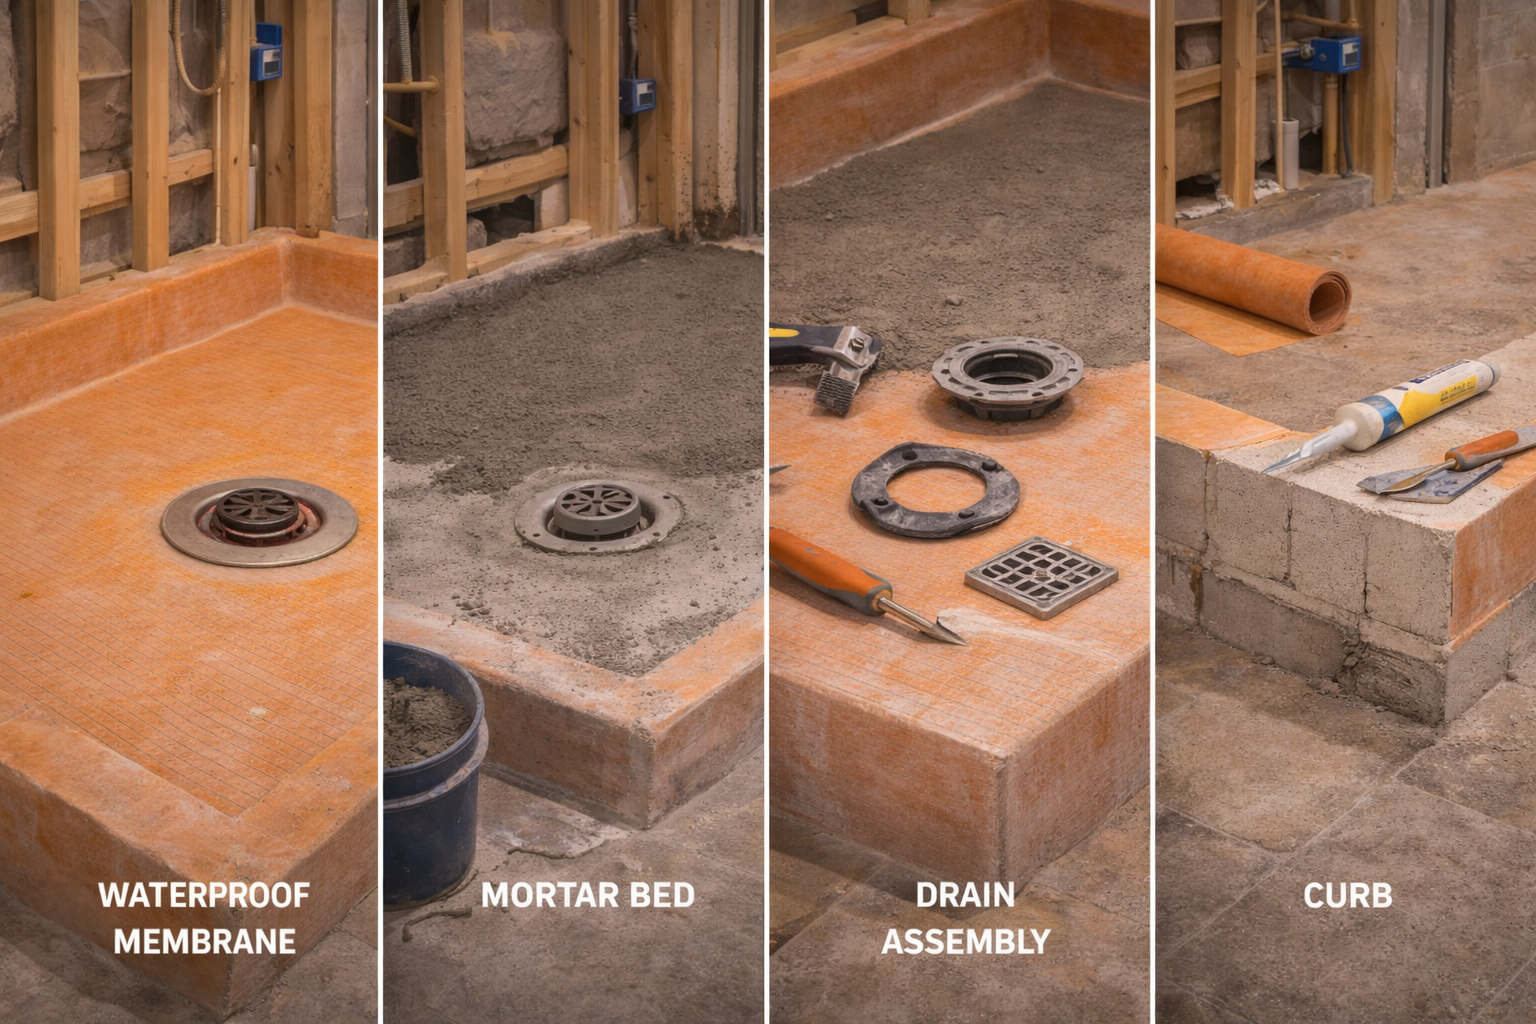
Shower pan installation requires the pan itself, a drain assembly compatible with the pan type, waterproofing materials, mortar or setting materials for tile pans, and sealants. Pre-formed pans need proper support beneath them and secure attachment to prevent flexing or movement.
For tile pans, the materials include a sloped pre-slope layer, waterproof membrane (sheet membrane or liquid applied), mortar bed for the tile, tile and grout for the surface, and sealants at joints and penetrations. The drain for tile pans typically includes a clamping ring that secures the membrane.
Additional components include the shower curb or threshold, which contains water and provides a transition to the bathroom floor. Curbs can be built from lumber and concrete board, formed as part of a solid surface pan, or purchased as pre-formed units. The curb must be solid, level, and properly waterproofed. When the remodel includes this feature, shower remodel can help homeowners understand the options in more detail.
What Upgrades Can Be Added With a Shower Pan
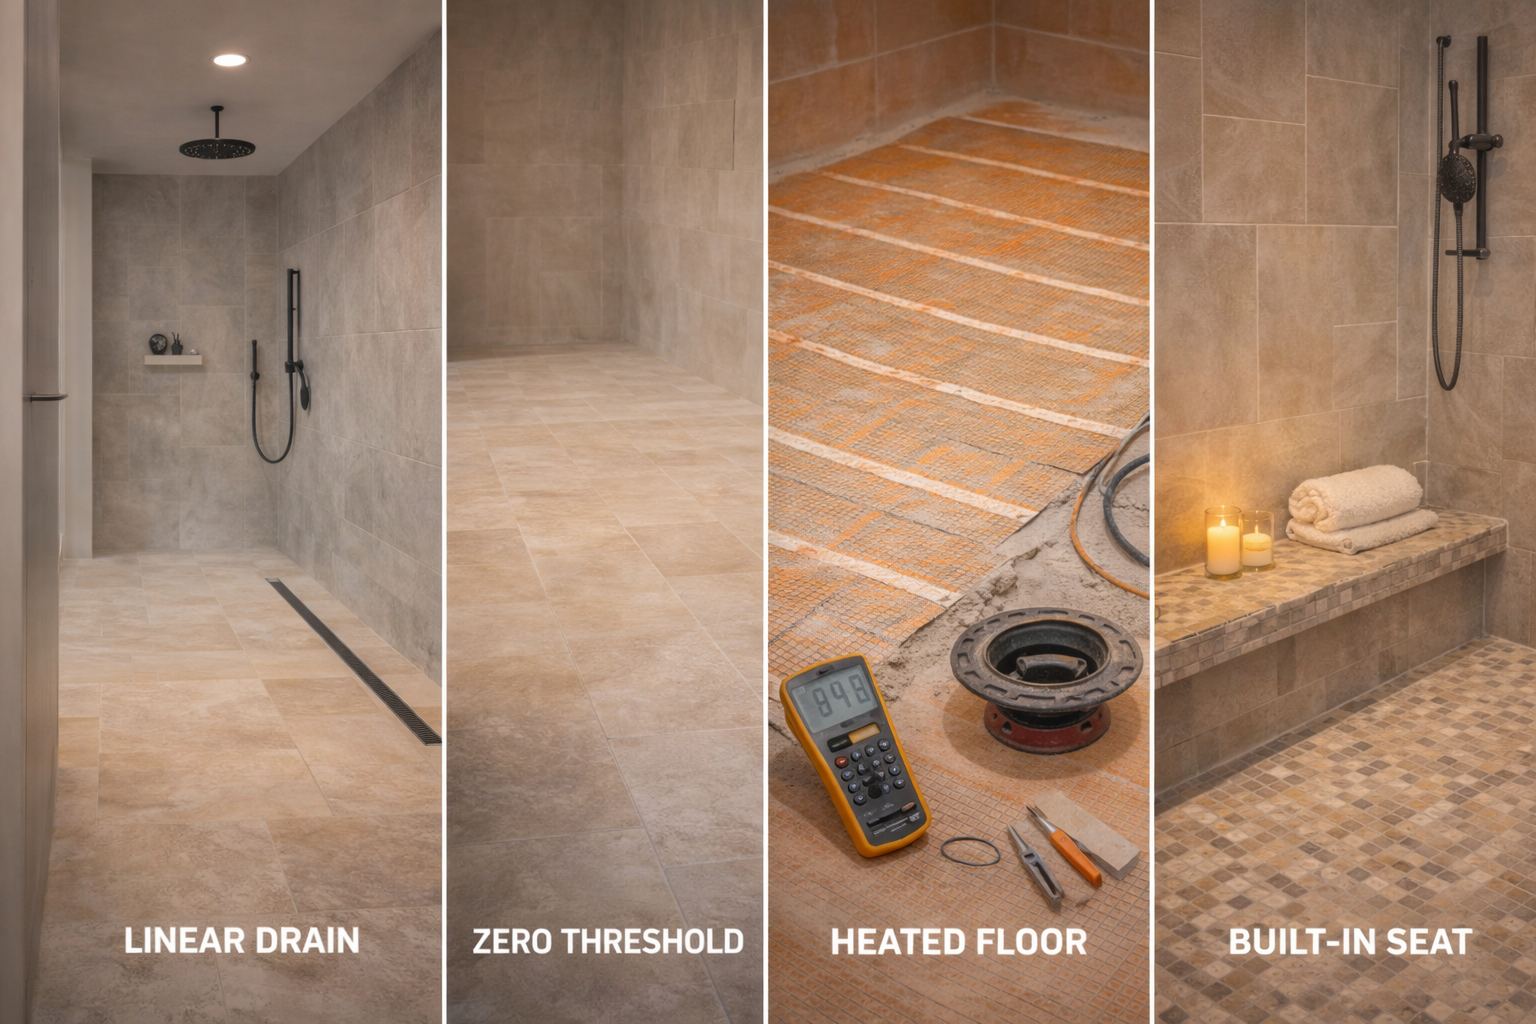
Linear drains allow for curbless or low-threshold designs and can be positioned against a wall or in the center of the shower. These drains require pans with a single-direction slope rather than the traditional four-way slope toward a center drain. Linear drains create a cleaner look and easier cleaning. For layout and clearance planning, many designers reference NKBA planning guidelines.
Heated shower floors can be installed beneath tile pans, providing warmth underfoot. This requires electric radiant heating mats installed in the mortar bed before tiling. The heating system must be tested before tile installation because repairs afterward require removing tile.
Built-in shower seats can be integrated into the pan design, either as fold-down seats attached to walls or as permanent benches formed as part of the pan structure. Seats must be properly sloped for drainage and waterproofed to prevent water penetration.

What Installation Details Matter in Shower Pan Work
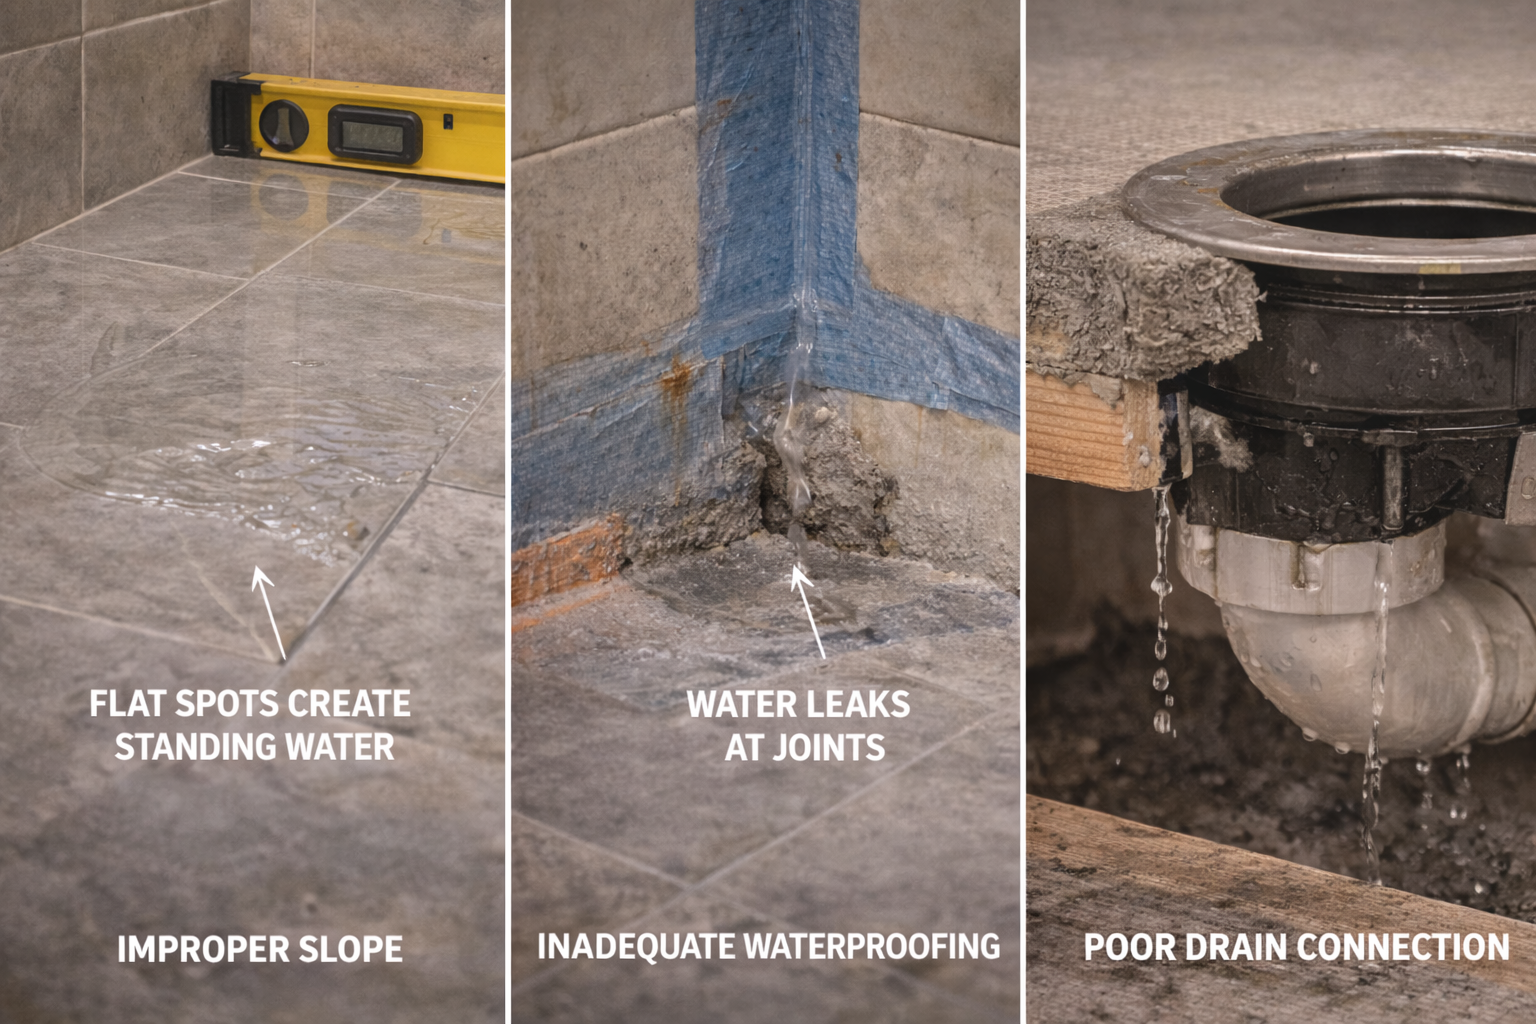
Proper slope is critical. The pan must slope toward the drain at a rate of at least 1/4 inch per foot to ensure water drains completely. Flat spots or reverse slopes create standing water that breeds mold and mildew. Pre-formed pans are manufactured with proper slope, but custom pans must be carefully built to achieve consistent drainage.
Waterproofing integrity determines whether the pan leaks. Every seam, corner, and penetration must be properly sealed. The connection between the pan and drain is a common failure point and requires careful attention to manufacturer specifications. Flood testing the pan before finishing work begins is essential.
Structural support prevents cracking and flexing. Pre-formed pans need solid, level subfloors beneath them. Tile pans need properly cured mortar beds that can support foot traffic without cracking. Any movement in the pan structure will eventually cause leaks or tile failure.
What Affects Shower Pan Cost
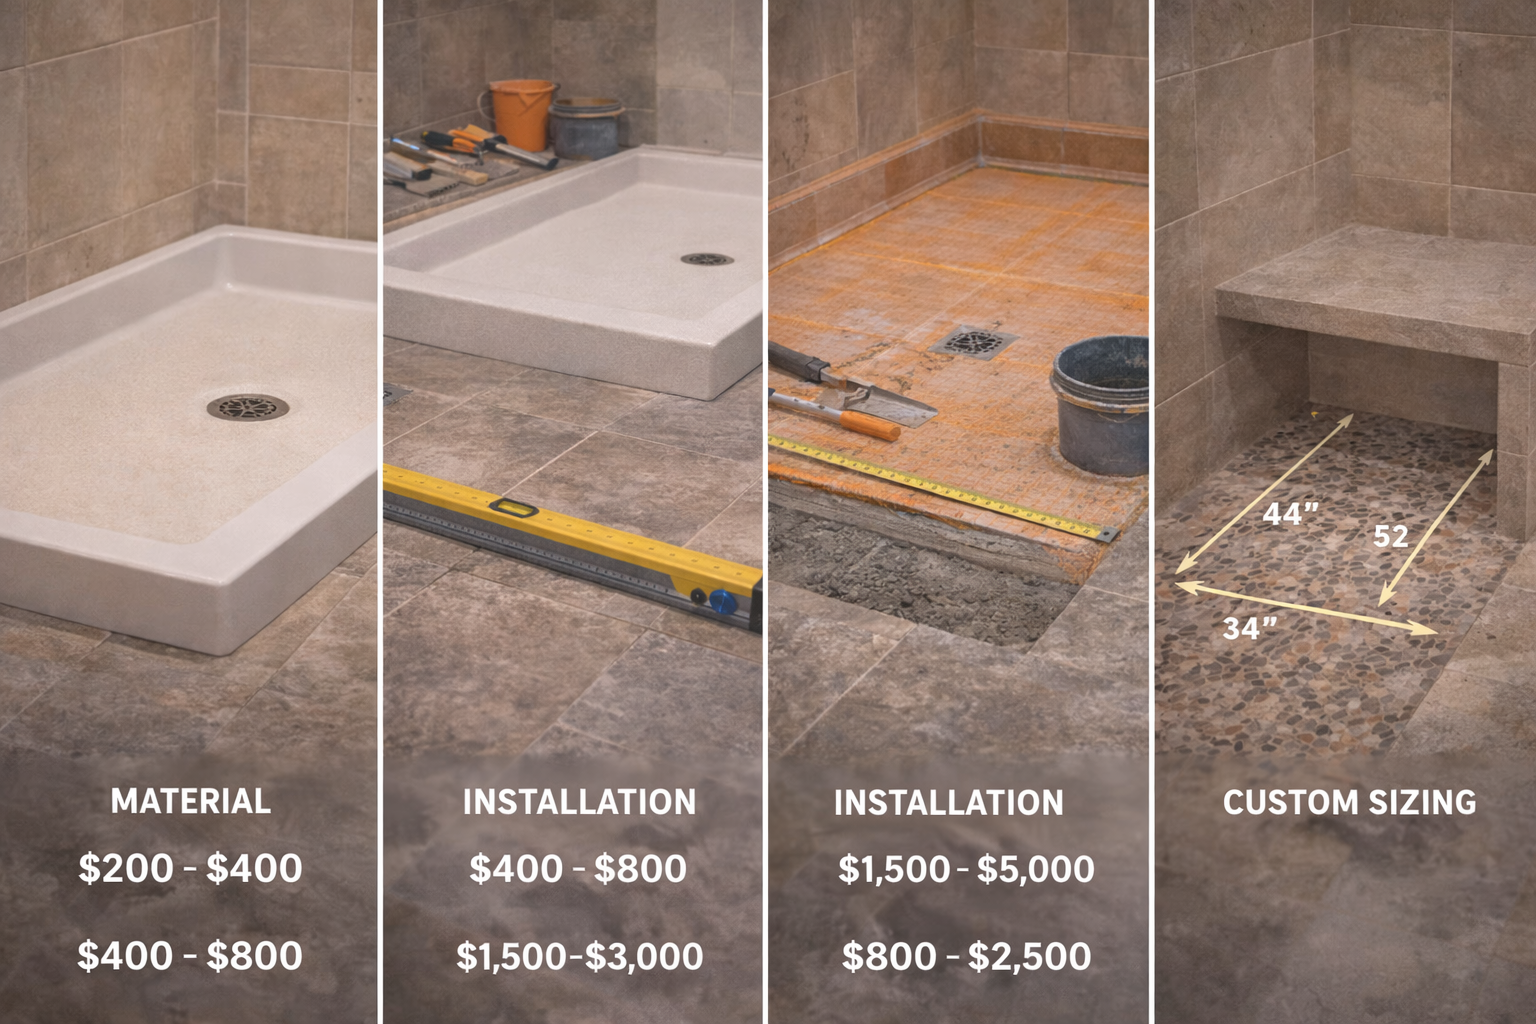
Material choice is the primary cost driver. Basic fiberglass pans start around $200 to $400. Acrylic pans range from $400 to $800. Custom tile pans with professional installation typically cost $1,500 to $3,000. Solid surface and composite pans fall between $800 and $2,500 depending on size and features.
Installation complexity affects labor costs significantly. A simple swap of a standard-size pre-formed pan might take a few hours. Building a custom tile pan requires multiple days for mortar curing and waterproofing steps. Curbless designs, linear drains, and unusual shapes all add time and skill requirements.
Subfloor condition impacts cost because damaged subfloors must be repaired before pan installation. Access to the drain connection may require opening ceilings below. These structural repairs add material and labor costs beyond the pan itself. A full shower pan replacement typically ranges from $1,000 to $4,000 depending on scope.
What Mistakes Should Homeowners Avoid With Shower Pans
Installing a pan on an unstable or improperly prepared subfloor leads to cracking and leaks. The subfloor must be solid, level, and properly supported. Skipping this preparation to save time or money guarantees problems later.
Choosing a pan based only on price without considering durability and warranty creates long-term issues. Cheap pans fail sooner and may not be replaceable without damaging surrounding walls. The cost difference between a quality pan and a budget pan is small compared to the cost of replacing a failed pan.
Skipping the flood test before finishing work is a major risk. The pan must hold water for 24 hours without leaking before tile or walls are installed. Finding a leak after the shower is finished requires destroying finished work to access the pan.
DIY installation without proper knowledge of waterproofing, slope requirements, and plumbing codes often results in leaks. Shower pan work affects the structure of the home and requires permits in most jurisdictions. Professional installation includes warranties and insurance protection.
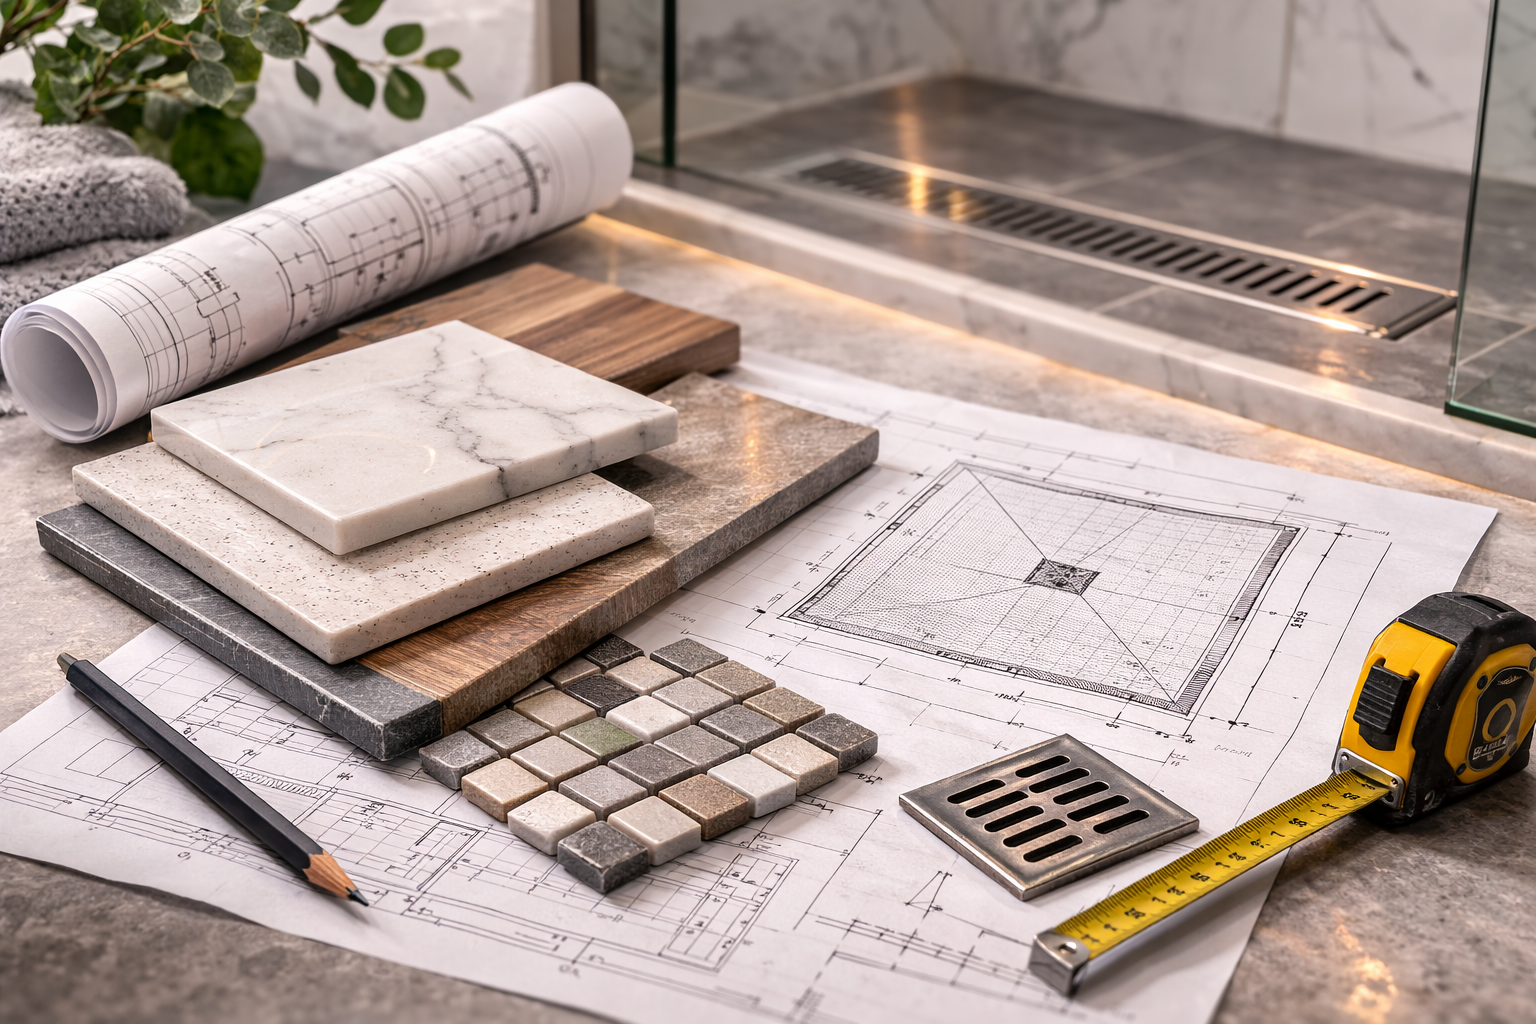
How Should You Plan Shower Pan Installation
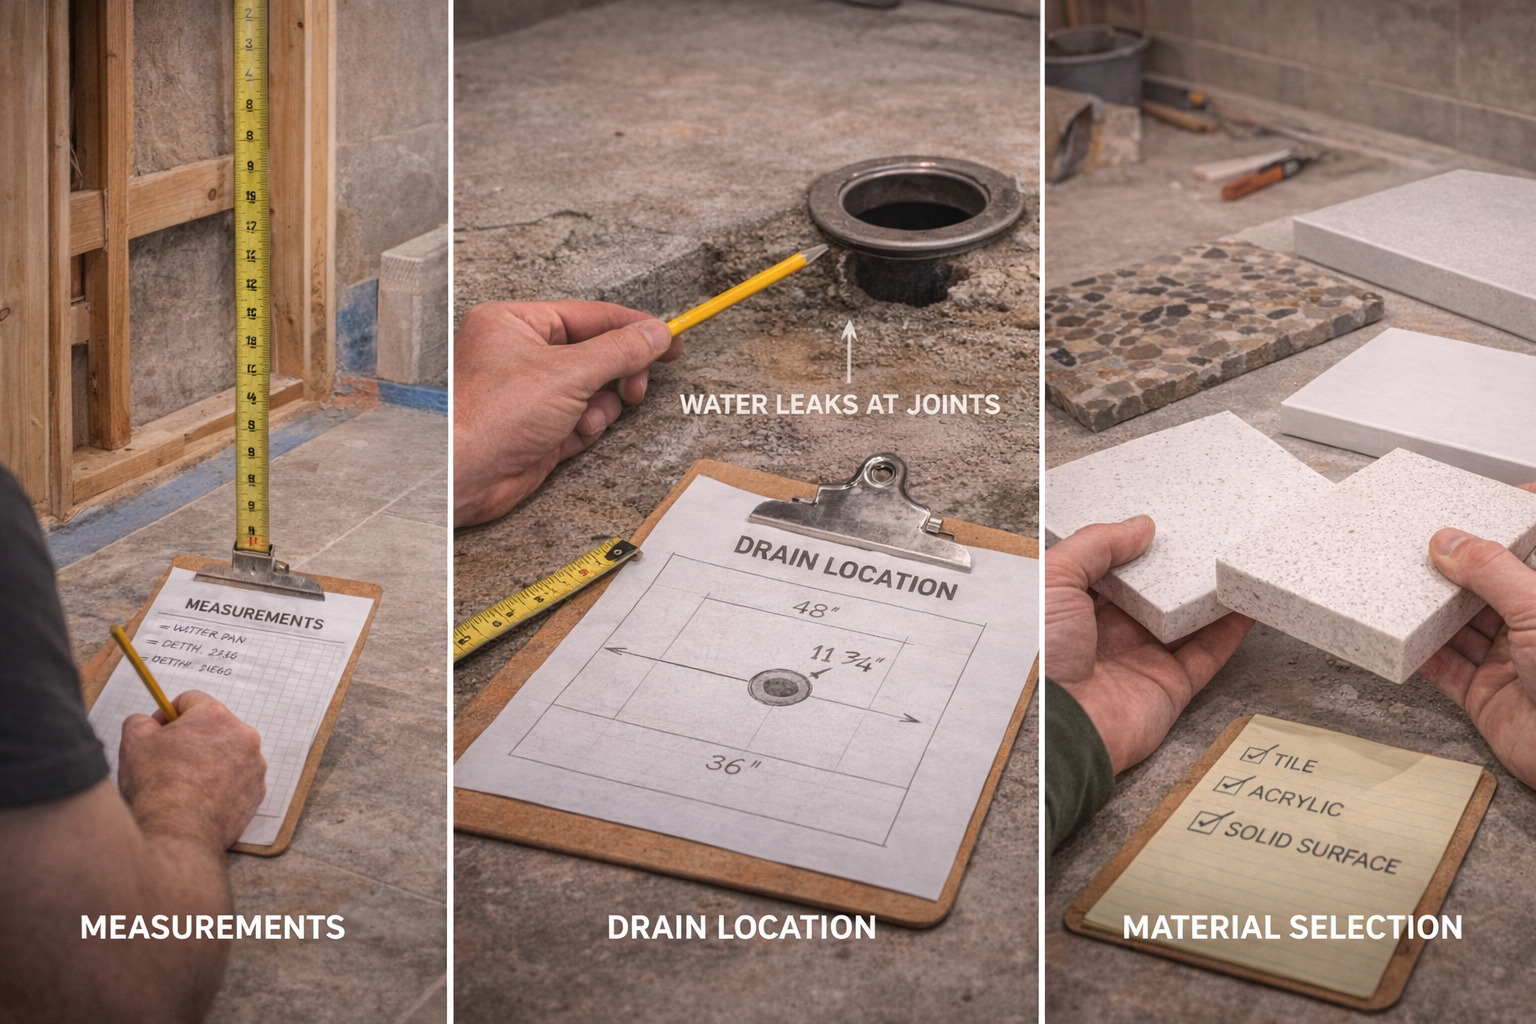
Start by measuring the shower space accurately and determining the drain location. The drain position often dictates pan options because moving drains is expensive. If the drain cannot be moved, choose a pan designed for that drain placement or plan for custom construction.
Decide on the pan type based on budget, design goals, and maintenance preferences. Pre-formed pans offer simplicity and lower cost. Tile pans offer customization and durability. Solid surface offers premium appearance with moderate maintenance. Match the pan choice to how the shower will be used.
Coordinate pan installation with other trades. Plumbing rough-in must be complete. Wall finishes should be planned to integrate with the pan edges. If the shower includes glass enclosure, the pan curb height and slope must work with the glass mounting.
Plan for the timeline. Pre-formed pans install quickly. Tile pans require multiple days for mortar curing between steps. Order materials early, especially for custom-sized pans. Do not start demolition until all materials are on-site and the installer is scheduled.
Frequently Asked Questions About Shower Pans
Quality shower pans last 15 to 30 years depending on material and installation quality. Fiberglass pans may need replacement after 10 to 15 years. Tile pans with proper waterproofing can last 20 to 30 years or more. Solid surface pans often last 25+ years with proper care.
Sometimes, but it depends on how the pan connects to the walls. Pre-formed shower surrounds often integrate the pan with the walls, requiring full replacement. Tile showers usually allow pan replacement independently if the wall tile extends below the pan edge. The junction between pan and walls must be properly sealed either way.
The best material depends on priorities. Tile with a waterproof membrane offers the most customization and durability. Solid surface provides seamless appearance and easy maintenance. Acrylic offers good durability at moderate cost. Fiberglass is budget-friendly but less durable. For most homeowners, tile or solid surface provide the best long-term value.
Signs of a leaking shower pan include water stains on ceilings below the shower, loose or cracked floor tiles, persistent mold or mildew, musty odors, and visible cracks in fiberglass or acrylic pans. A professional can perform a flood test by plugging the drain and filling the pan with water to check for leaks.
Pre-formed pans can be DIY projects for experienced homeowners with proper tools. Tile pans require significant skill in waterproofing and should usually be left to professionals. Mistakes in pan installation cause water damage that far exceeds any savings from DIY work. Consider your skill level and the complexity of the installation before deciding.
A curbless shower pan eliminates the threshold between the shower and bathroom floor, creating a seamless transition. These pans require precise subfloor preparation to achieve proper slope while maintaining level entry. Curbless designs improve accessibility and create a modern look but cost more due to additional labor and materials.
Shower pans should slope at least 1/4 inch per foot toward the drain. This slope ensures water drains completely without pooling. Pre-formed pans are manufactured with proper slope. Custom tile pans must be carefully built to maintain consistent slope across the entire surface. Insufficient slope causes standing water and mold growth.
A flood test checks the pan for leaks before finishing work. The drain is plugged, and the pan is filled with water to the curb height. After 24 hours, the water level is checked. Any drop indicates a leak that must be repaired. This test is essential for tile pans and recommended for any custom pan installation.
Generally no. Shower pans require proper support and connection to the drain that existing floors cannot provide. Pre-formed pans need solid, level subfloors. Tile pans need proper mortar beds. Installing over existing surfaces creates height problems, drainage issues, and connection failures. Remove old materials down to the subfloor for proper installation.
Most jurisdictions require permits for shower pan replacement because it involves plumbing and waterproofing that affects the building structure. Check with your local building department. Professional installers typically handle permits as part of their service. Unpermitted work may void insurance coverage and create problems when selling the home.